Lesson: Creating a Map using a GeoTiff Image
About the lesson:
You will create a simple map by "drawing" map objects on top of a base
map image. This process is an alternative to the traditional approach of
digitizing a map from a hardcopy, using a digitizing tablet. The advantage
to digitizing on an image imported to ArcView, is that the base map can
always be produced for reference or to add additional detail. Later, we
will learn how to give virtually any scanned image geographical reference
units, for now we will start with an image that is already georeferenced.
About Geotiffs:
The USGS offers Digital Orthoquadrangle (DOQ) in a format called GeoTIFF,
a georeferenced version of the popular Tagged-Image File Format (TIFF).
This allows users withimage rendering programs, web browsers, image processing
systems, and geographic information systems to easily read and display
DOQ images. If you have a program that understands GeoTIFF, the geographic
reference of the image will be read in along with the image. This is an
important kind of "metadata" for people who intend to use the image in
conjunction with other geospatial data. This georeferencing information
can be manually input to most programs that need it, but differences in
reference models and input syntax can make this process time consuming
and prone to error.
Geotiff DOQ's come in black and white and RGB (Red Green Blue) color.
These files can be very large, especially those with multiple color bands.
They are typically distributed as 1/4 of a quad. The dataset you will use
has be subsampled such that the original resolution of about 1m per pixel
has been reduced to about 2.2 m per pixel. It has also been subsetted so
that only a fraction of the quad is shown. Even so, the image is about
6 MB. The original Color Geotiff DOQ representing 1/4 of a USGS Quad was
140 MB.
Get the Sample Data:
Create a directory in your working directory called "Machias".
/nsm/class/gly560/username/Machias
Into this directory, download the tar ball of the Geotiff that you will
need, via this ftp
link. If that doesn't work, the same file can be obtained via anonymous
ftp at:
ftp.eng.buffalo.edu/pub/mwbecker.
Refer back to the unix
lesson if you need to and extract the files from the tarball archive.
If you use the tar -xvf options, a subdirectory will be created called
"geotiff" that contains the image files that you need. List the files
in this directory, you should have:
/nsm/class/gly560/username/Machias/geotiff/Machias_Geotiff.*
Where * is bil, hdr, and stx. These files make up a single georeferenced
image in ArcView format. Once you are sure the files have been extracted,
delete the archive file geotiff.tar.
Lesson:
Prepare the work space for the project. In the Machias directory, create
two directories, one named "Shapefiles" and the other "Rasterfiles" These
will be used to hold all vector and raster data, respectively. Move the
Geotiff image files into your Rasterfile directory, where you will access
them later. You can remove the geotiff directory once the files have been
moved.
Open ArcView with a new project. Choose not to add themes now.
Save the project in the Machias directory as Machias.apr .
Under the Project menu (i.e. NOT the view window), open the Properties
dialog. Specify the working directory you will be using for this project
as the "Shapefiles" folder that you created. Most data you will produce
will be shape files, so this will be the most convenient setting for this
project.
To work with images, you will need to add an extension to ArcView. Go
to File...Extensions, and make sure that Tiff 6.0 Image Support is checked.
With the Views icon highlighted, click the New button (or, double-click
the Views icon). A new, empty view window, View1, opens. You can resize
and reposition this window anytime you need to. The gray area on the left
side of the view is the Table of Contents. It's empty now, but when you
add a theme to the view, the theme's name, the symbol used to draw it,
and a check box indicating whether it's currently displayed will appear
in the Table of Contents.
Rename the view by going to the View.. Properties dialog and changing
the name "View 1" to "Machias." In the same dialog box, change the Map
Units to meters, and the Distance Units to kilometers. Click OK.

Click on the add new theme button  to open add theme dialog box. As Data Source Types:, select select "Image
Data Source". Then go to your Rasterfiles folder, select the Geotiff Image
"Machias_Geotiff.bil" and click OK. Click the box to the left of the theme
title to display it. You should see the Geotiff in your view window. With
the theme highlighted, go to the Properites dialog under the Theme menu,
and change the name of the theme to Machias Geotiff. Save the project.
to open add theme dialog box. As Data Source Types:, select select "Image
Data Source". Then go to your Rasterfiles folder, select the Geotiff Image
"Machias_Geotiff.bil" and click OK. Click the box to the left of the theme
title to display it. You should see the Geotiff in your view window. With
the theme highlighted, go to the Properites dialog under the Theme menu,
and change the name of the theme to Machias Geotiff. Save the project.

Gliding the cursor over the image, you will notice that in the upper
right hand corner of the window, the location coordinates change. This
is because the geotiff has UTM coordinates, which are displayed in meters.
Create a new theme by clicking New Theme under the View menu. Choose
to create a line theme and click OK, save the them in your Shapefiles folder.
Then name the new theme Roads, but as you rename the geotiff theme.
-
You will notice that the check box next to the them is surrounded by a
dotted line. This means that is open for editing. Use the zoom button
 to select a portion of the image on which to draw a road. Click on the
line drawing tool
to select a portion of the image on which to draw a road. Click on the
line drawing tool  and draw a section of road. Double click to end drawing. Do not try to
duplicate too much detail of the image, we are not drawing a high-resolution
map.
and draw a section of road. Double click to end drawing. Do not try to
duplicate too much detail of the image, we are not drawing a high-resolution
map.
-
Double click on the theme to open up the legend editor. Double click on
the symbol to change the line type and color to styles of your choosing.
Close the dialog.
-
With the Roads theme highlighted, open the theme properties dialog (Theme..
Properites). On the left of the dialog, highlight the "Editing" icon to
open the editing properties. Here is where you can set the "Snapping" properties
of the drawing objects. If we want "T" intersection roads to abut perfectly,
it is too difficult to do by eye. We will allow ArcView to "snap" object
together so the meet neatly. Under the Snapping box, choose general and
change Tolerance to .01 km. This means that when we get within 10 meters
of an object, the object will snap to the nearest object. Click OK to close
the Theme Properites dialog.
-
Try drawing two roads at a "T" intersection (see figure below). The roads
should snap together.

-
Now draw road lines over the major roads. Draw the roads for now as just
line segments, without regard to whether you draw them continously. When
we are concerned with thematic properties, we will want to join line segments
that represent a single road, but that is for a later exercise. When you
are finished drawing the roads, choose to Stop Editing under the Theme
menu, and save your edits. Save the project.
-
Next repeat the process of creating a new line theme, renaming, changing
the legend, to map the visable streams. Save the theme as streams.shp and
name it Streams. Again, do not become overly concerned with mapping the
detail of the streams. Save your edits. Save the project.
-
The lakes will be represented as a polygon shapes. To draw polygon shapes,
click on the line shape button
and hold it down to see the other shape options. Chose the polygon draw
tool
 . Draw polygons
over the major lakes. Note that with the polygon tool, you are forced to
draw closed shapes. Save your edits.
. Draw polygons
over the major lakes. Note that with the polygon tool, you are forced to
draw closed shapes. Save your edits.
-
Finally, add a new point theme, and save as wells.shp. Rename the theme
as Wells. Add point shapes by selecting the point draw tool
 .
You will draw wells on the maps, but they cannot be seen at the resolution
of the Geotiff. Use the coordiate display to place the wells at the coordinates:
.
You will draw wells on the maps, but they cannot be seen at the resolution
of the Geotiff. Use the coordiate display to place the wells at the coordinates:
| X |
Y |
| 4,699,230 |
705999 |
| 4,698,870 |
706277 |
| 4,699,830 |
706696 |
Save your edits and save the project.
-
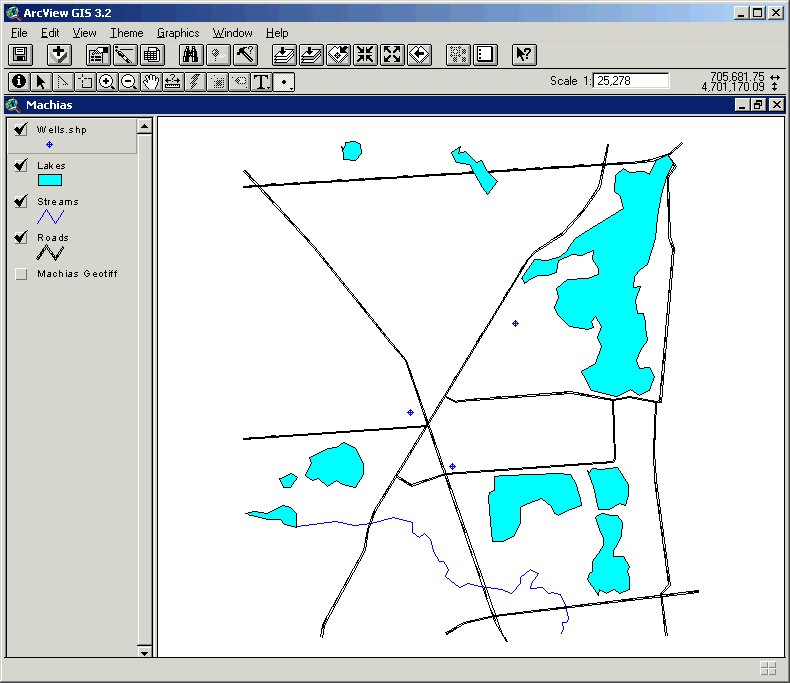
If you deselect the Geotiff image, you should see the result of your mapping
will look something like this.
-
Now we will prepare a printable map by creating a layout. Return to the
project window, choose Layouts from the icons at left, and click the New
button. You will see a blank page.
-
To place the map you created on the page, click on the View Frame button
 and drag a window to the size you want your map to be. Leave space for
a titles, legends, etc. When you chose the box size, a dialog box will
open that asks you which view you wish to insert. Choose the Machias view,
and click OK. You will see your map in the center of the page. To move
the map around, you will need to select the choose button
and drag a window to the size you want your map to be. Leave space for
a titles, legends, etc. When you chose the box size, a dialog box will
open that asks you which view you wish to insert. Choose the Machias view,
and click OK. You will see your map in the center of the page. To move
the map around, you will need to select the choose button  .
.

-
Go back to the view page, and zoom in on a section of the map. Now return
to the Layout view. You will notice that the layout has changed to account
for the new view. What you see in the view window, will appear on the layout
page.

-
Now click and hold down the View Frame button
to add a legend
 . After
you place the legend, the dialog box will ask you to choose a view. Again,
choose Machias. All themes that are open in the view will have a legend.
Legend names correspond to the names of the themes. If you don't like the
legend names, change the theme names now.
. After
you place the legend, the dialog box will ask you to choose a view. Again,
choose Machias. All themes that are open in the view will have a legend.
Legend names correspond to the names of the themes. If you don't like the
legend names, change the theme names now.
-
Add a scale by choosing the scale bar icon. Add a scale to the bottom of
the layout. You must choose the view and also the units you wish to display.
Choose meters for units and a unit interval of 500 m.
-
Finally, add a title by adding a text box
 to the top of the page. Give the map the title "Town of Machias, Cattaraugus
County, New York". Note you can force a line break by holding the shift
key and hitting Return.
to the top of the page. Give the map the title "Town of Machias, Cattaraugus
County, New York". Note you can force a line break by holding the shift
key and hitting Return.
-
Move the objects around to get the map the way you want it.
-
Use the text box to place your name at the lower left hand corner of the
map.
-
Print the map to the laster printer in the back of the room, by selecting
Print... and then typing nsm858lw in the Printer box.
-
You're DONE! Mine came out looking like this:

To Print the Map:
1) Click on the print button
2) Select View1 in the top drop down box (next to Print:)
3) Click on the button next to "print to file." A window will appear
showing the location where the file will be saved. Defualt name is "arcview.ps".
Change it to Machias.ps and save it in the machias directory.
4) Click OK on the Print file window and again on the Print window.
5) Open a console or terminal window. Navigate to the machias directory
to print file, type lp machias.ps The map should print.