
We will (try to) use ASTER data for the Remote Sensing component of the class. You will be asked to order data for a region of interest to you. Data can be obtained for free (at least for now) from the USGS EDC.
ASTER (Advanced Spaceborne Thermal Emission and Reflection Radiometer) is an
imaging instrument that is flying on Terra, a satellite launched in December
1999 as part of NASA's Earth Observing System (EOS). ASTER will be used to obtain
detailed maps of land surface temperature, emissivity, reflectance and
elevation. The EOS platforms are part of NASA's Earth Science Enterprise, whose
goal is to obtain a better understanding of the interactions between the
biosphere, hydrosphere, lithosphere and atmosphere.
ASTER is the only high spatial resolution instrument on the Terra platform.
It will be used with MODIS, MOPITT, MISR and CERES which monitor the Earth at
moderate to coarse spatial resolutions. ASTER's ability to serve as a 'zoom'
lens for the other instruments will be particularly important for change detection,
calibration/validation and land surface studies.
To Obtain An ASTER Scene, use the EOS Data Gateway, Maintained by the USGS EROS Data Center. Go to the web site and register as a Guest. This will take you to the Primary Data Search page. Use the search tools to find scenes in the area in which you are interested. You are looking for ASTER Level 1B Registered Radiance at the Sensor.
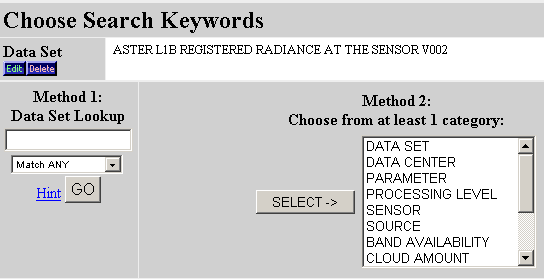
First search for the available data sets pertaining to ASTER. You can do this by typing "aster" in the search window (Method 1) or searching by DATA SET (Method 2). I prefer to use Method 2. Highlight DATA SET in the Method 2 list, and click SELECT ->
This will give you a list of all available datasets. Find the ASTER L1B RADIANCE AT THE SENSOR dataset, highlight it, and click "OK" at the bottom of the screen.
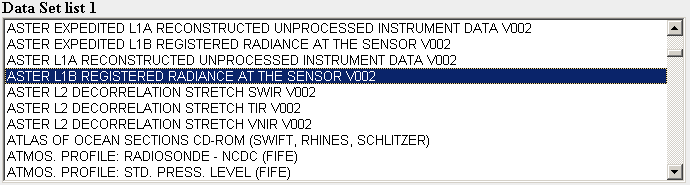
The selected dataset will appear in the search window:
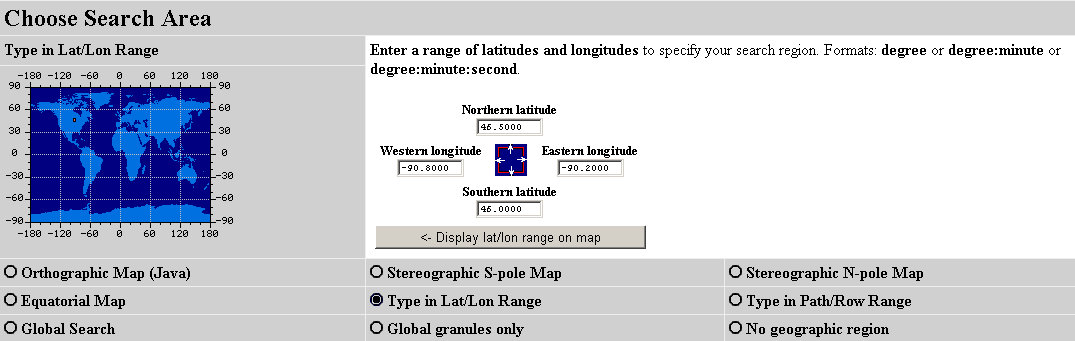
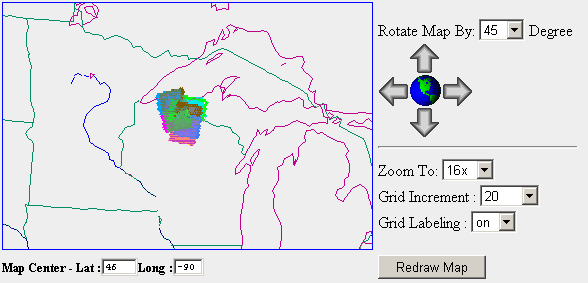
Once you select your Dataset, then you can search for location and date. Use the Java tool to specify the location, or one of the other methods if you prefer. Any way you do it, you want to specify a lat-long box in which your scene will reside. You are advised to take the time to find the exact location of the area of interest, rather than searching around using this tool. It is slow and doesn't contain much reference. Even a small box can result in many scenes (granules).
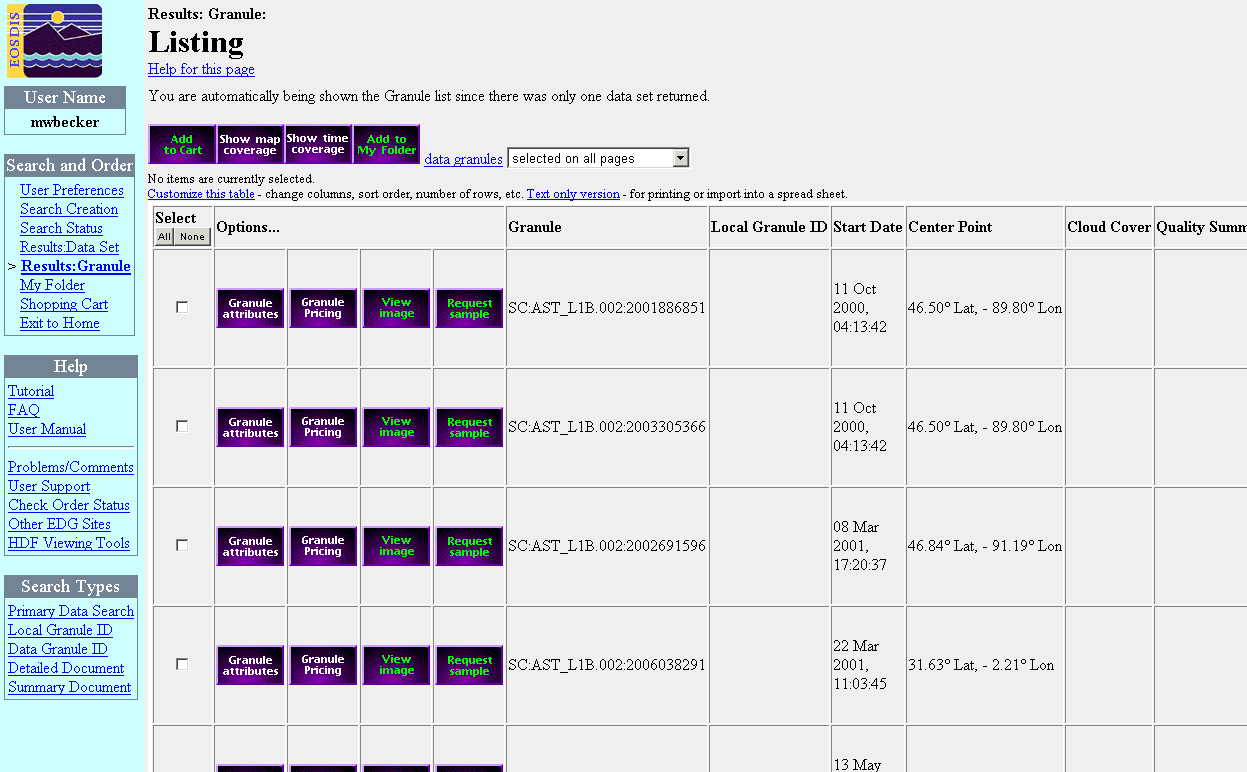
After you run the search, the tool will come back with a list of "granules" or scenes. You will need to filter through this list to find a scene that is in the right location, and is clear. Note that ASTER aquires in Day and Night, the times are given in the granule list:
You may display the location of the granules on a map, but checking individual granules and clicking "Show Map Coverage". Locations of scenes will be shown on the map. Scene areas are color coded to the granule list. Note that day time scenes lean right, and night time scenes lean left, because the satellite is moving in different directions relative to the earth at those times.
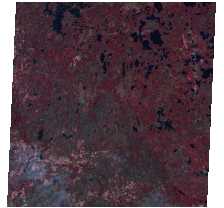
You may also preview an image, by chosing "View Image" from the granule list. You will get a thumbnail of the scene. Note that if you choose a night time scene the preview will be black, even though ASTER's thermal bands may register a usable image. The only way to find out if a night time thermal image is usable, is to order the data. The thumbnail images look like this:
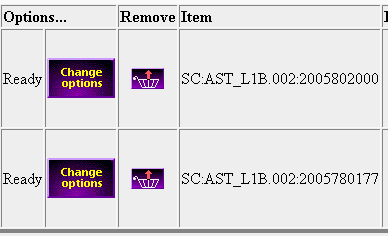
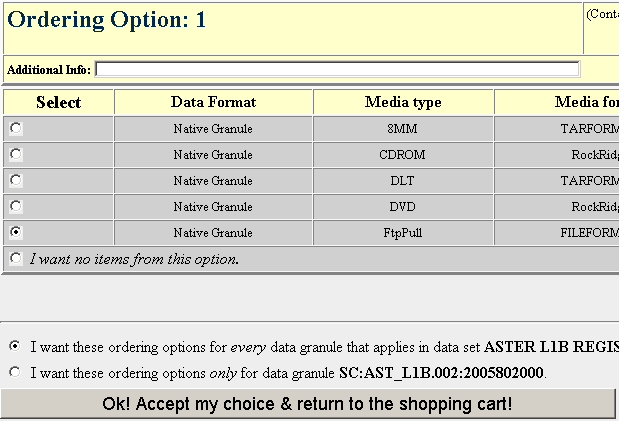
Once you have selected the scenes you want, you can save them to your shopping cart. The order tool will give you the opportunity at this point to change your ordering options:
You will want to make sure that your order via "ftp-pull". This means that EDC will send you an email when your data are ready, and you can log on via anonymous ftp and download the data. It is much faster than any of the other options. Make sure that you choose this option for all data that you order (see bottom of the form):
After this, follow the typical billing procedure for web purchases. Fill out all the shipping address etc. Don't worry, there will be no charge at the end. Before you submit, it should show you an order form that has a totol of $0.00 at the bottom.
You should get an email confirmation of your order momentarily. I don't know how long data will take to arrive. This have been very slow at the EDC lately.
If you receive another email saying your order has FAILED. Contact EDC. You may need to order your data again, so save your email you confirmation of the order. It has the granule names on it.